
Frequently Asked Questions
To send a link to a specific FAQ, add ?faq=[number] to the end of the URL. Example: http://addchime.com/faq.html?faq=30
Chime FAQ
Verify SQL authentication
- Open SQL Server Management Studio with an account that has admin privileges to the server instance
- Connect using Windows Authentication
- Right-click on the SQL Server instance name and click Properties
- Select the Security page
- Under Server authentication, verify that SQL Server and Windows Authentication Mode is selected
- Click OK
- Expand Security
- Expand Logins
- Right-click on 'sa' and click on Properties
- On the General page, set the SA password to something that you can remember
- Click on the Server Roles page and verify that 'sysadmin' is selected under Server roles
- Click OK
Setup SQL for remote connections
- Open SQL Server Configuration Manager
- Under SQL Server Configuration Manager (Local), expand SQL Server Network Configuration
- Select 'Protocols for [SQL_instance_name]'
ex: 'Protocols for SQLEXPRESS' - Enable 'Named Pipes'
- Enable 'TCP/IP'
- Right-click on 'TCP/IP' and go to Properties
- Click on the 'IP Addresses' tab
-
For all sections verify the following:
TCP Dynamic Ports: None, no data
TCP Port: 1433 - Click OK
- If you receive a warning message that the changes won't take effect until the service is restarted, click OK
- Under SQL Server Configuration Manager, click on SQL Server Services
-
Right-click on 'SQL Server [SQL_instance_name]
ex: 'SQL Server (SQLEXPRESS)' - Click on 'Restart'
- If restarted successfully, you can close SQL Server Configuration Manager.
Setup Firewall Exception for SQL
- Open Network and Sharing Center
- Click on Windows Firewall
- Click on Advanced Settings
- On the left-hand side, click on Inbound Rules
-
Click on 'New Rule'
When the New Inbound Rule Wizard comes up, do the following:- Select 'Port' for the Rule Type
- Click Next
- For Protocol and Ports, select TCP
- Select 'Specific Local Ports', and specify 1433
- Click Next
- For Action, select Allow the connection
- Click Next
- For Profile, select all three (domain, private public)
- For Name, specify the name of the rule
- Click Finish
- Verify that the new rule shows up in Inbound Rules and verify that the port number is correct
- You can exit Windows Firewall.
Instant Chime does leverage the Microsoft Lync® UCMA APIs, but does not require a trusted app configuration. Our Chime ‘queues’ login on behalf of a named Lync® entity (i.e. a SIP enabled user in Active Directory) so each queue will require a unique SIP login to Lync®. However, since our queues access Lync® via these named entities, we call the SIP users dispatchers, then Chime does not require a complex trusted application configuration.
If you receive a 403.14 error after installing Chime on Windows Server 2008R2, it may be an issue related to ASP.NET referencing the .NET 2.0 framework when it needs to reference the .NET 4.0 framework.
This problem can be solved by updating the script maps. See MSDN ASP.NET IIS Registration Tool for more information
We find that running the following commands in the command prompt on the server clear this issue quickly.
Note: This may update all applications to .NET 4.0
                                cd \
                                cd Windows\Microsoft.NET\Framework64\v4.0.30319
                                aspnet_regiis -ir
You can download the UCMA 4.0 Runtime from Microsoft® here.
Right now, Instant Chime supports Lync 2013® in an ‘on premise’ deployment. If you require Lync 2010® support, please contact our sales group and discuss your deployment and requirement.
One of the main benefits of Instant Chime is the ability for an agent to handle multiple chat requests at one time. Many of our customers configure their agents to handle 2 concurrent conversations at a time, however, this is an easy option to configure and agents may be configured to handle up to 5 concurrent conversations.
Yes – since Microsoft Lync® provides an excellent infrastructure for both application sharing, and video conferencing, Chime can escalate service desk request using both video and application sharing.
We have designed Chime with the core idea that it should take less than 30 minutes to IM enable a service desk – or help desk. So, once Chime is installed and configured, it does not require any additional programming to bring a queue online – and Lync® enable a help desk. Of course, many customers have requirements for customer web chat clients, interaction with existing CRM systems, or custom routing options, which may add some work to the enablement process.
This will be based on the number of agents behind each service desk queue and the number of inbound IM conversations. However, 30 queues per Chime server is a totally reasonable estimate – and this should be able to support a large scale enterprise service desk.
Yes – Chime provides multiple manager level dashboards as well as interactive charting and reporting modules. The Chime dashboards are designed to provide a line of business manager with a real time, and historical snapshot, of the queue and the service desk activity. With the dashboard, managers can easily view inbound IM traffic as well as trending topics (such as which problems are creating help desk requests).
Yes – many of our customers utilize ASA to calculate agent efficiency as well as Microsoft Lync® click to chat IM queue performance.
The Chime trial is a 30 day evaluation including all of the Chime features for up to 5 queues and 50 experts. At the end of 30 days your trial license can be easily converted to a purchase license without reconfiguring queues or losing data.
Chime comes with 15 standard reports including call volume by queue or expert, average speed to answer, first call resolution rates, and more.
Reports may be customized depending upon your organizational needs and whether the data is captured. Let the Instant development team know what type of reporting you are interested in gathering and they will determine the best course of action for reporting.
Yes, Chime dashboards visually display top keywords in a tag cloud to help managers identify the most common issues or identify any new topics that may emerge due to new tools or software deployed across the enterprise.
Each queue may be configured with customized canned messages for your enterprise. These may be displayed to the seeker or agent at a variety of engagement points in the conversation. For example, when a chat message is submitted, at specified time intervals when there is a gap in the chat conversation, based on most popular requests, and a when chat is ended to name a few.
Chime can support virtually any language. Chime allows you to define languages, and associate text resources for each language.
We recommend a dedicated server to host the Chime application server. This can be either physical, or virtual, and we support Windows Server 2008R and newer. We typically see Chime deployed on virtual servers and we use virtual servers internally (i.e. using Hyper V).
You don’t need to install any additional software on a front-end. We do have a Lync® Windows Client Extension setting that can be applied to each agent provisioned in the system. The Lync® CWE setting will allow Chime to position information about the seeker in a window attached to the agent’s Lync client.
You can certainly use an existing SQL Server – this is not a problem.
You need to change the Server authentication from Windows Authentication mode to SQL Server and Windows Authentication mode. Here is an reference which shows the appropriate steps » support.microsoft.com
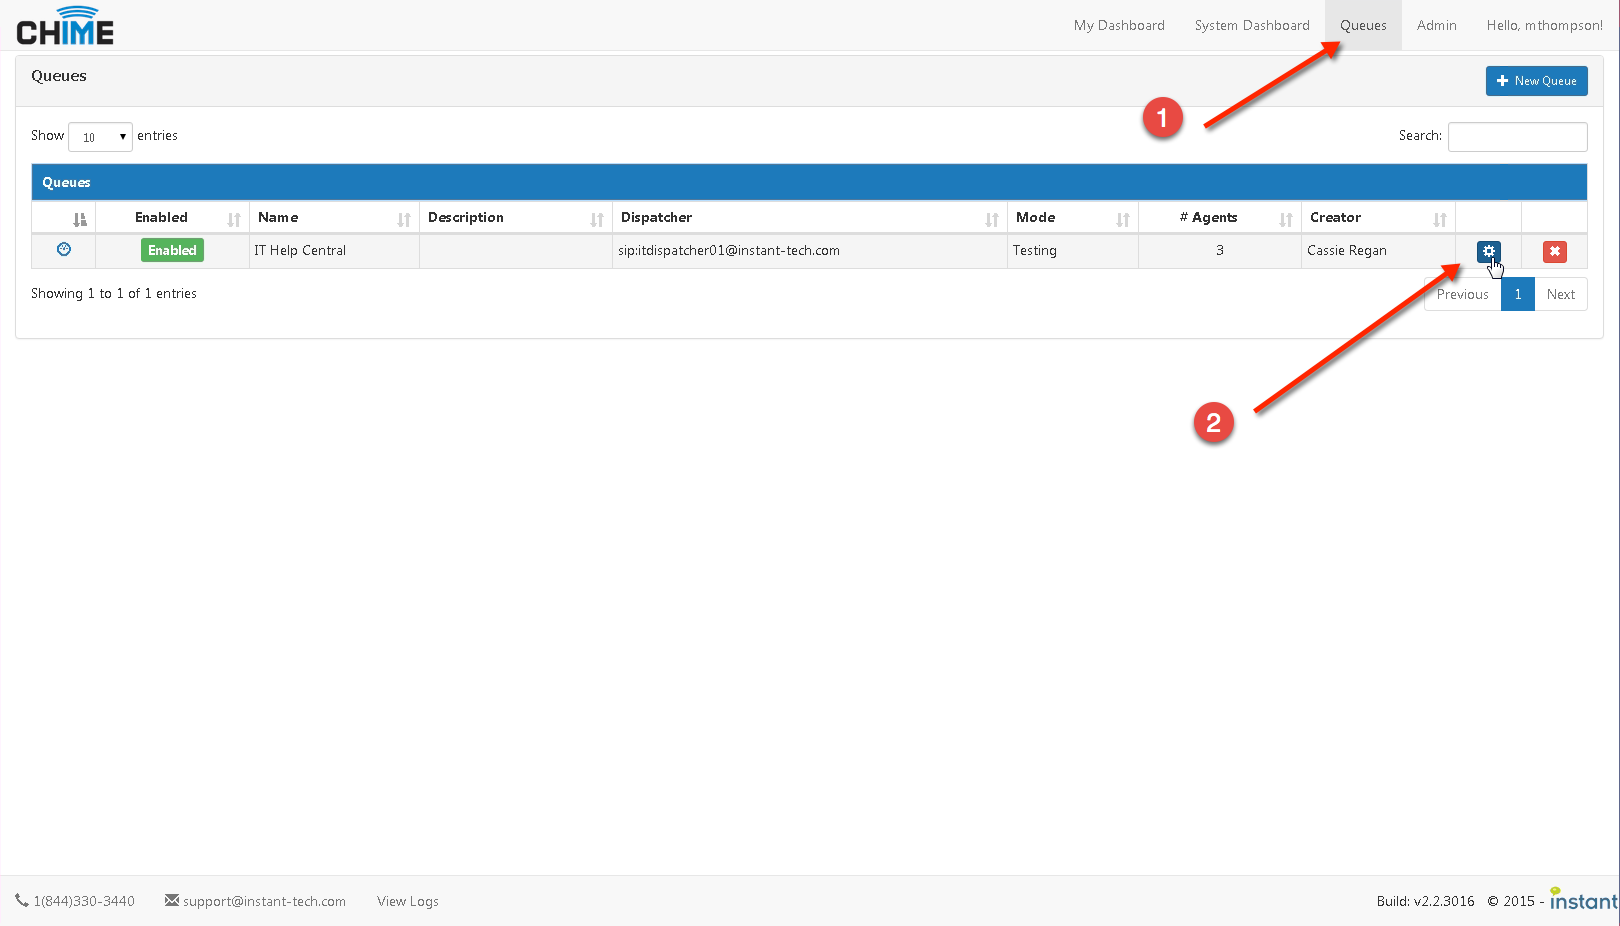
- Click the Queues tab
- Go to Queue Settings either from the queue's dashboard or by clicking the gear icon on the right side of the row for that particular queue.
- Click on the Advanced tab
-
Click on the 'Edit this URL' button (only visible if you have enabled the Agent
Context Window)
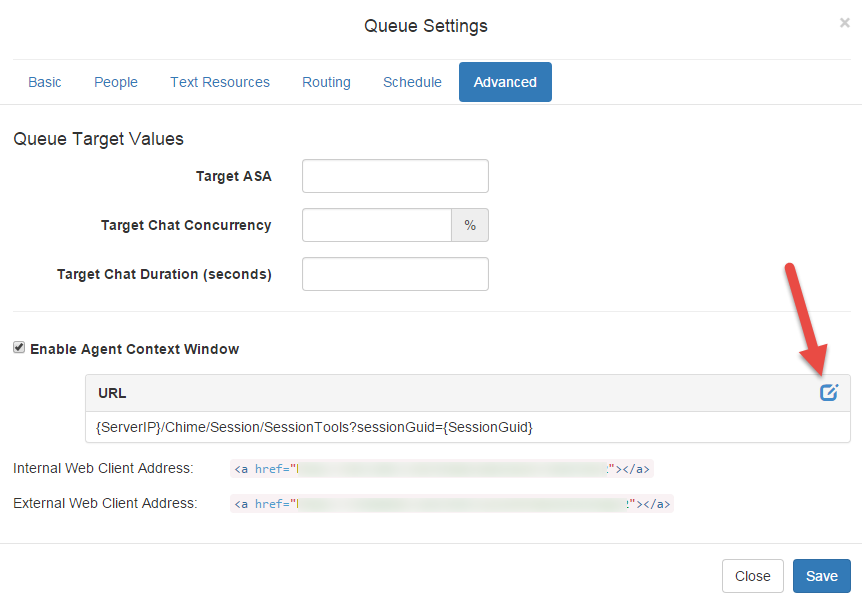
-
You will see {ServerIP}/Chime/Session/SessionTools?sessionGuid={SessionGuid}

-
You need to replace {ServerIP} with {ServerFQDN}. You can do this by simply deleting
'IP' and typing 'FQDN'.
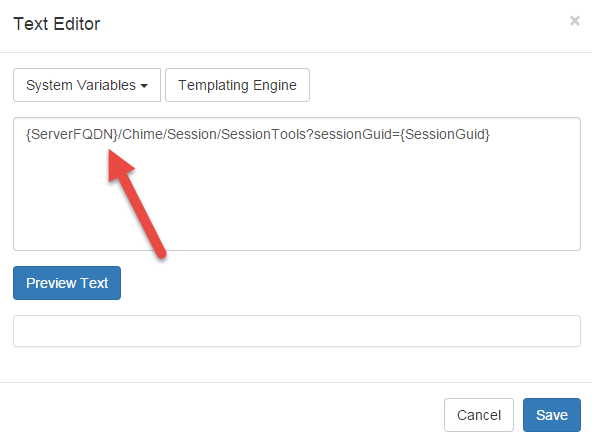
- Once you have made the change and see {ServerFQDN}/Chime/Session/SessionTools?sessionGuid={SessionGuid} - press Save in the Text Editor
- Press Save in the Queue Settings
- Close the Queue Settings
- If necessary, repeat for any additional queues
| Browser | Manager Panel | Web Client | Agent Context Window | Lync® Web App Support |
|---|---|---|---|---|
| IE11 | ||||
| IE10 | ||||
| IE9 | 1 | |||
| IE8 | 1 | |||
| IE7 | 1 | |||
| Firefox | 3 | |||
| Chrome | 3 | |||
| Safari | 1 | 3 | ||
| iOS Safari - Mobile | 2 | 1 | 3 | |
| iOS Safari - Tablet | 3 | |||
| iOS Chrome - Mobile | 2 | 3 | ||
| iOS Chrome - Tablet | 3 |
1 Unable to send files and/or rate agent.
2 Small screen size causes some layout issues.
3 Opens in separate window.
Yes. This can be accomplished simply by using the SIP-URI for the dispatcher of the queue in which you want to initiate a chat.
Example markup:
<a href="sip:demoDispatch01@instant-tech.com">Start Chat!</a>
***If you have Lync® installed click one of the following links to see how the above example markup works
- Lync® Office 365 » Start Chat!
- Lync® on Premise » Start Chat!

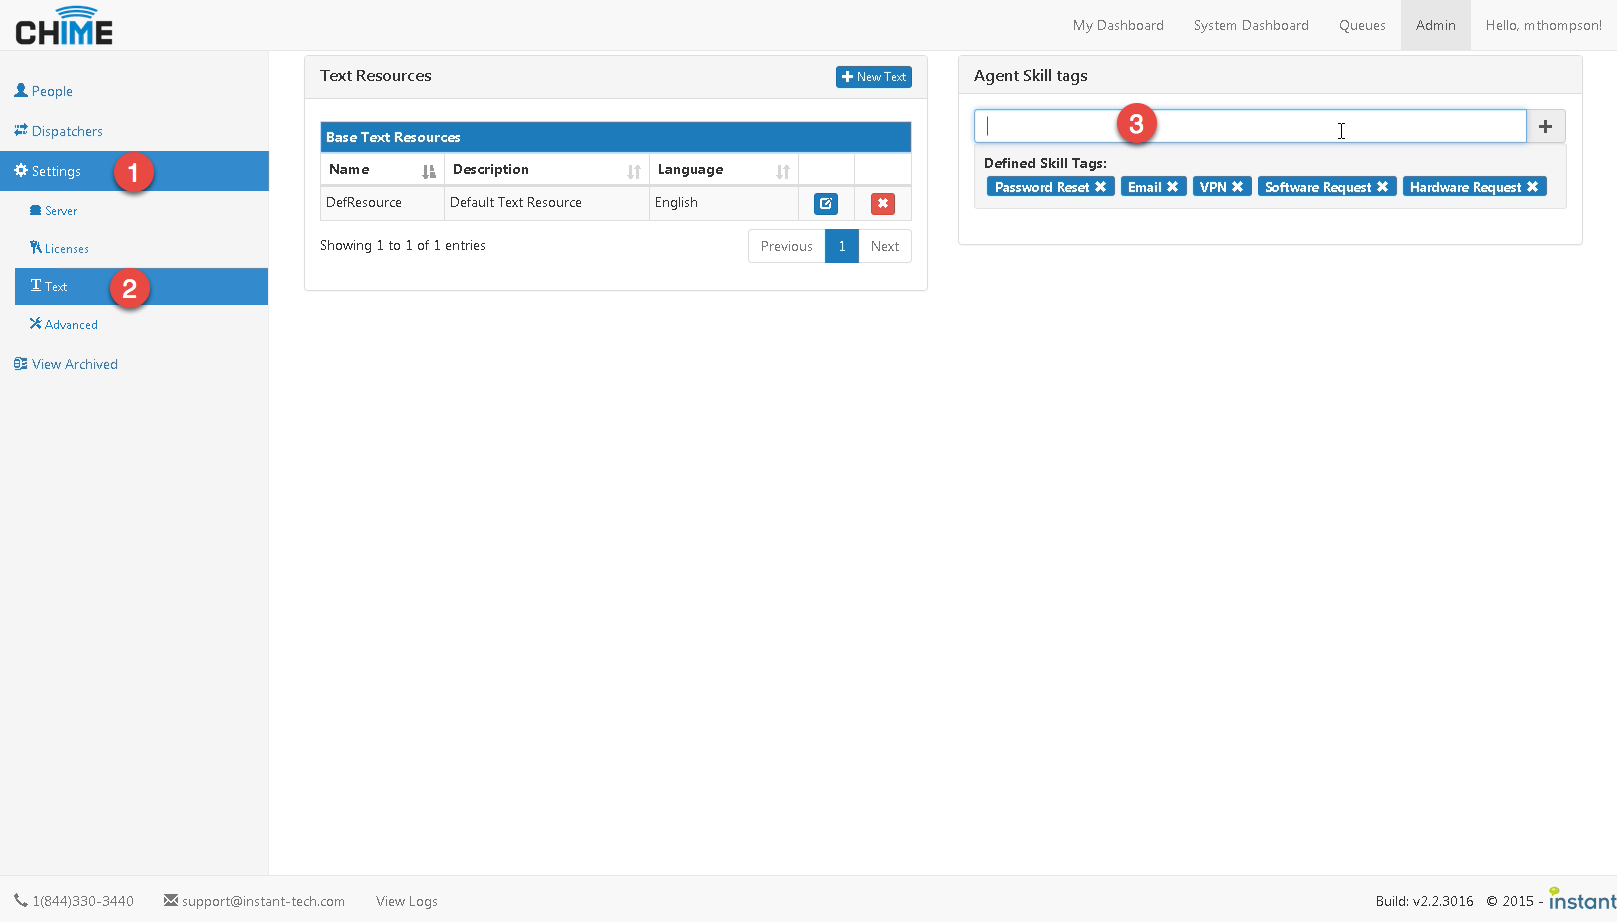
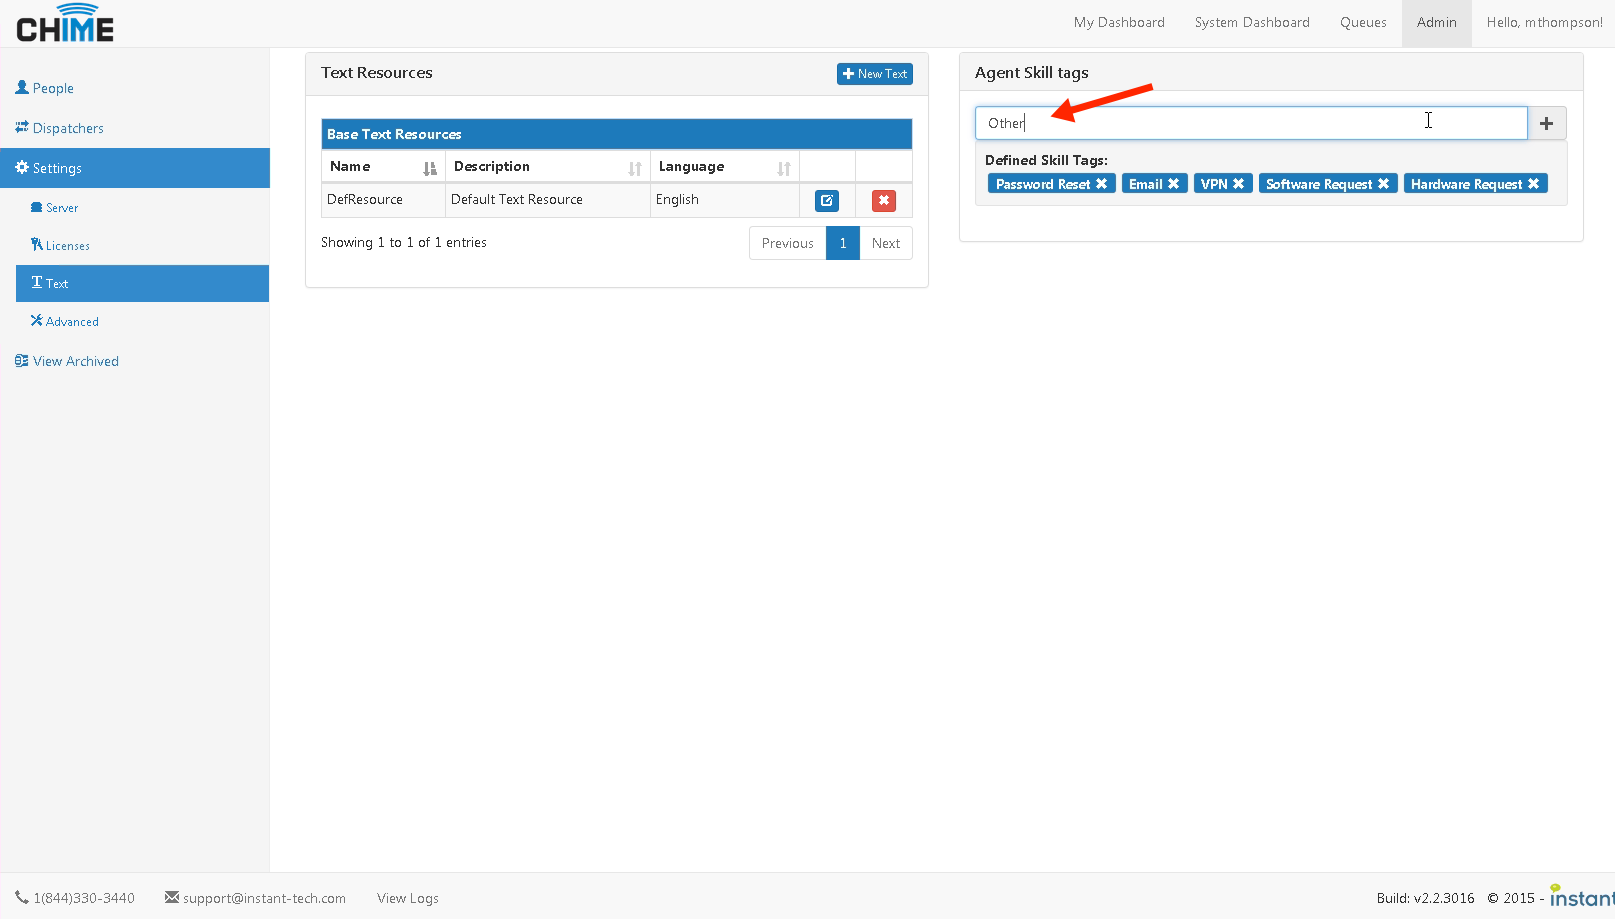
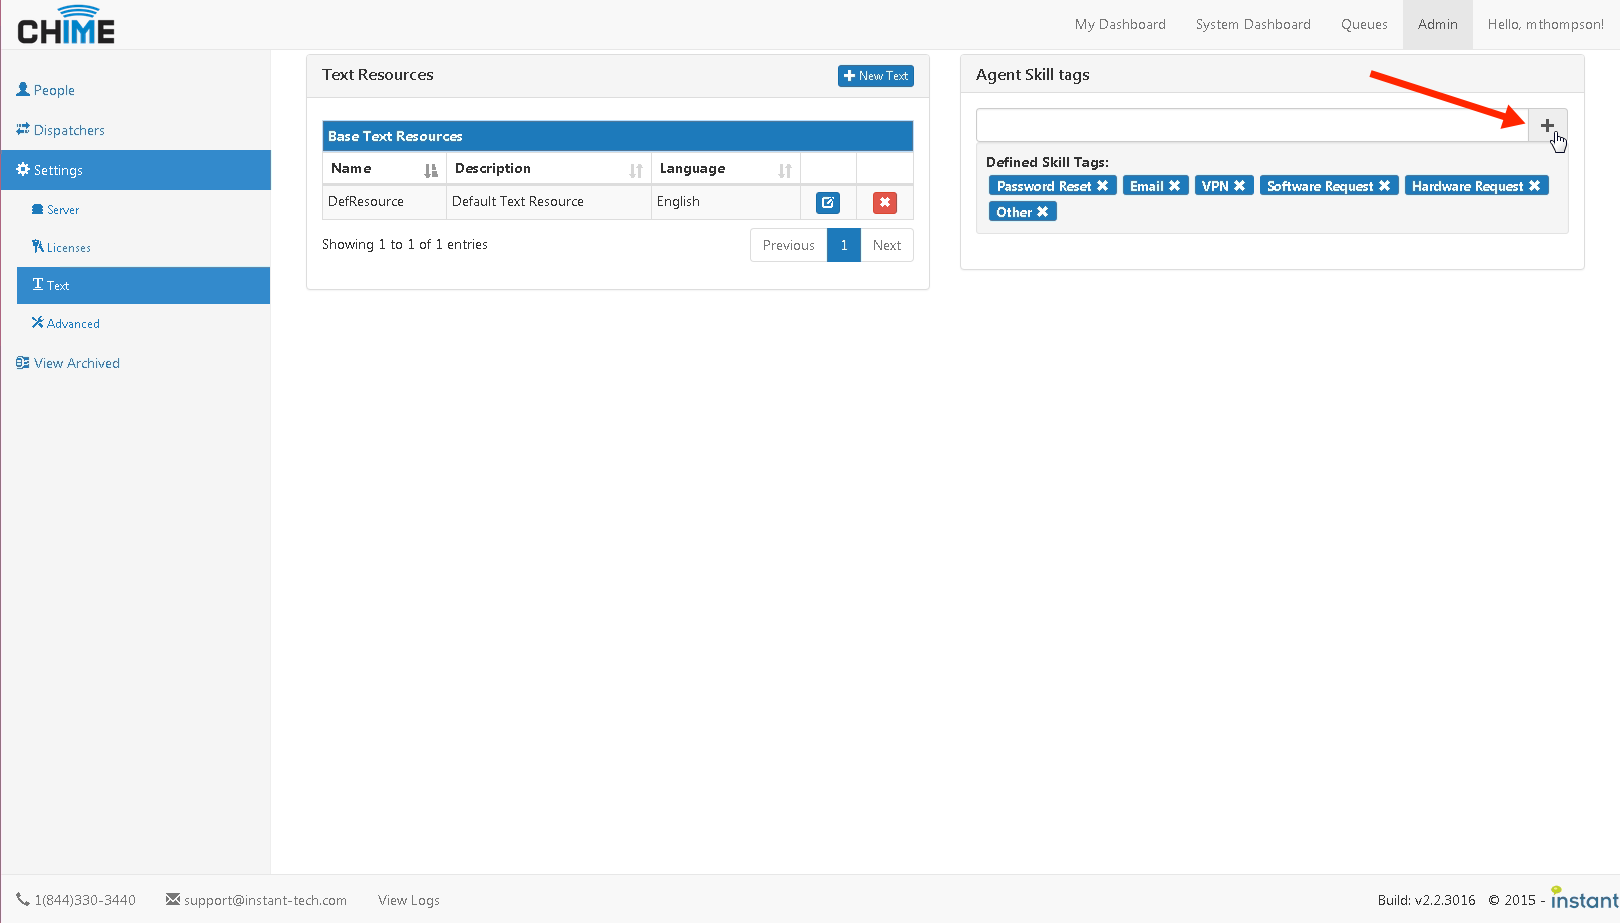
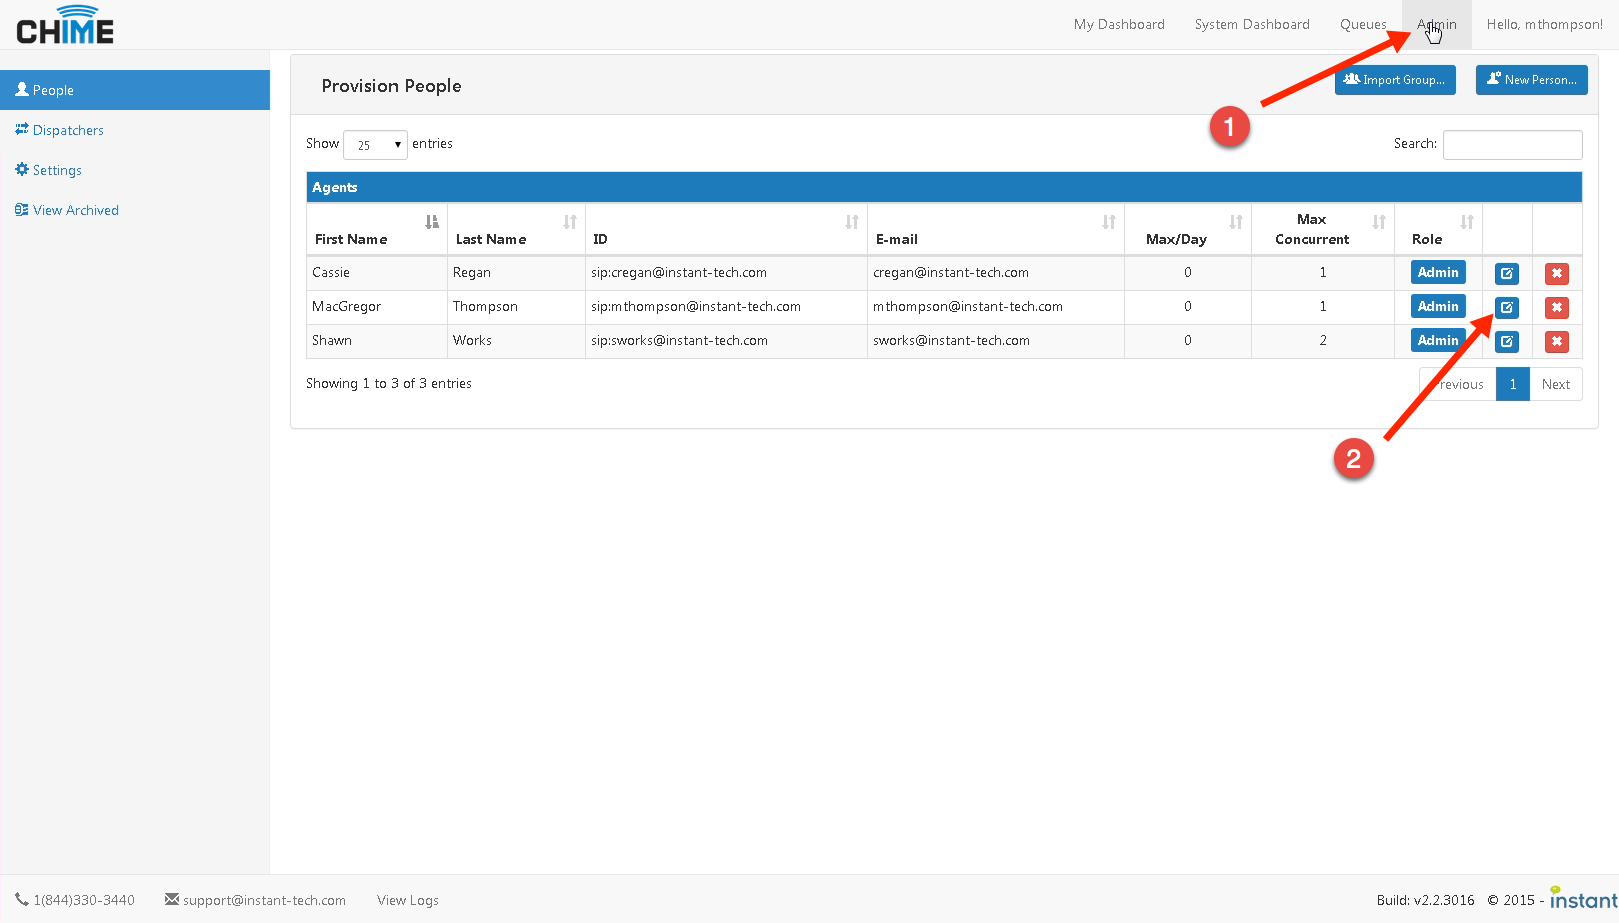
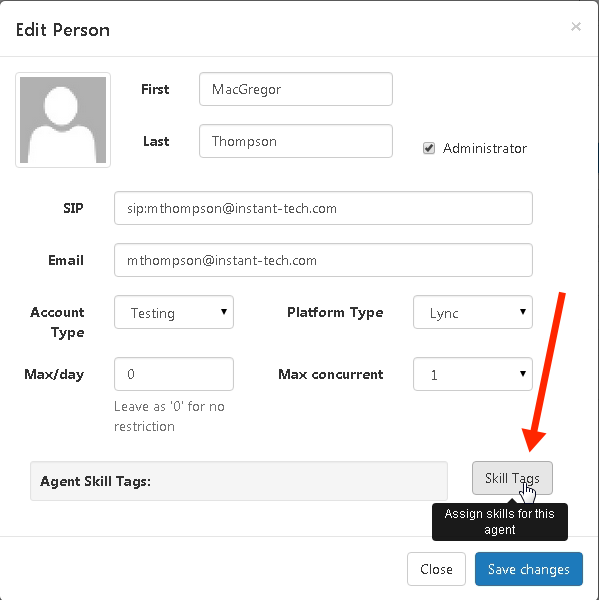
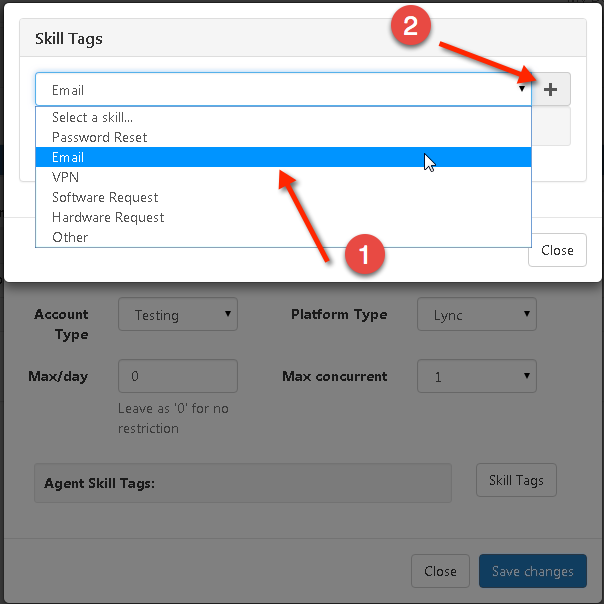
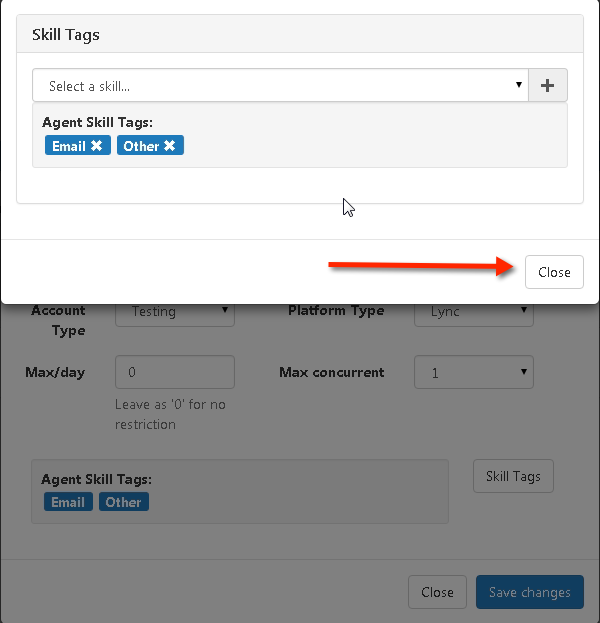
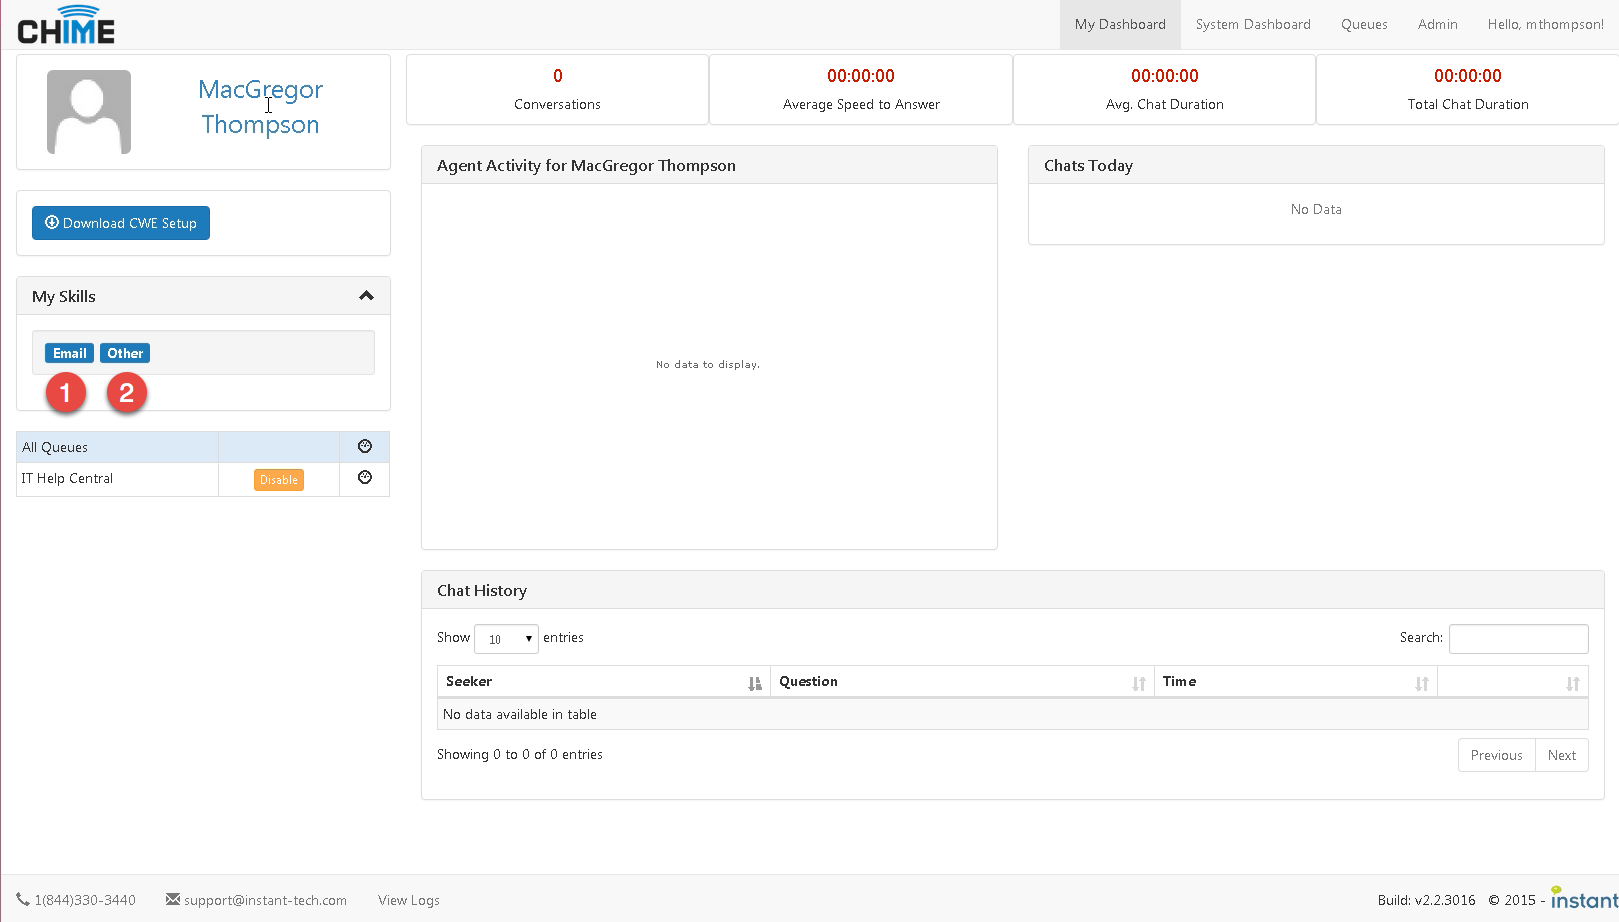
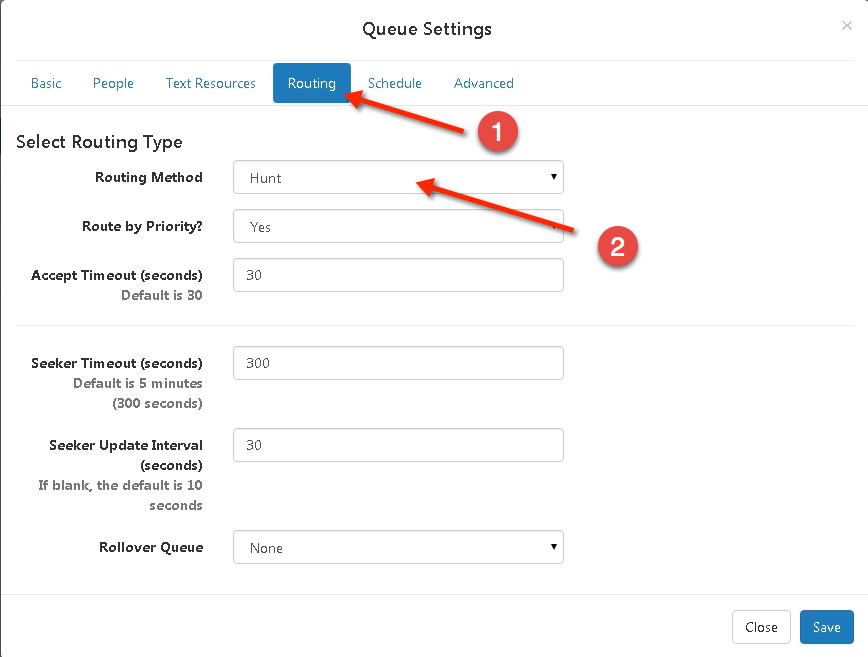
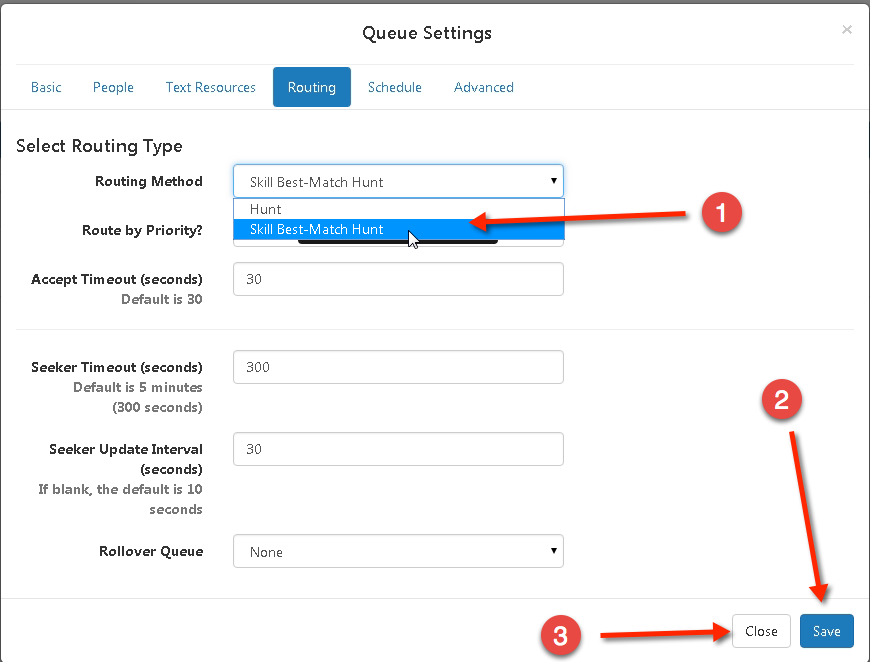
See the media below for detailed instructions. Also see addchime.com/skill_tag_routing.html for more information.
Screen shots:
 Skill Tag Routing - Step-by-step (16)
Movies:
- Use Chime Hub. Chime Hub is a cloud based service that acts as a proxy for your Chime deployment. It is easy to set up and use, but contains a subset of features and might not have everything you need.
- Set up a reverse proxy. Using a reverse proxy would allow your web client to have all of its features, but is a little more difficult to set up. Here is a PDF of the steps for setting up an Apache reverse proxy server.
- Stick a portal page in the DMZ. A benefit of this choice is it gives you the entire web client feature set, however, it is not as secure as the previous 2 options.
Steps:
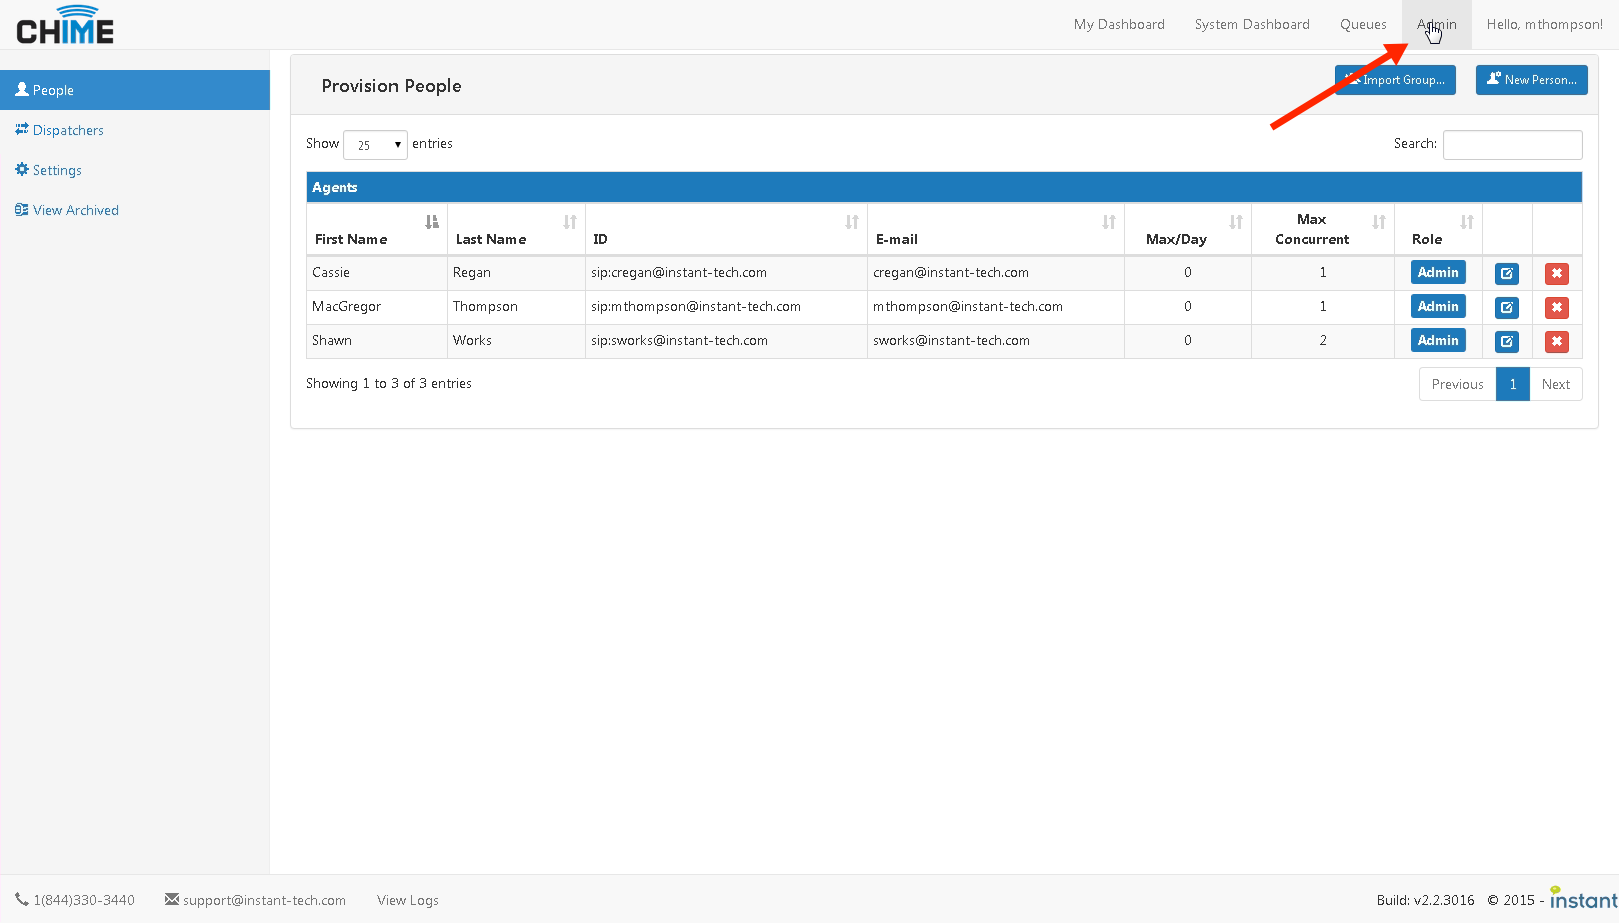
- Go to Admin > Settings > Web Clients
- Click on the 'Edit Client' button for the web client you wish to edit.
- Check the box 'Authenticate Web Seeker using Integrated Windows Domain Authentication'
 Steps
Steps
 Prompt
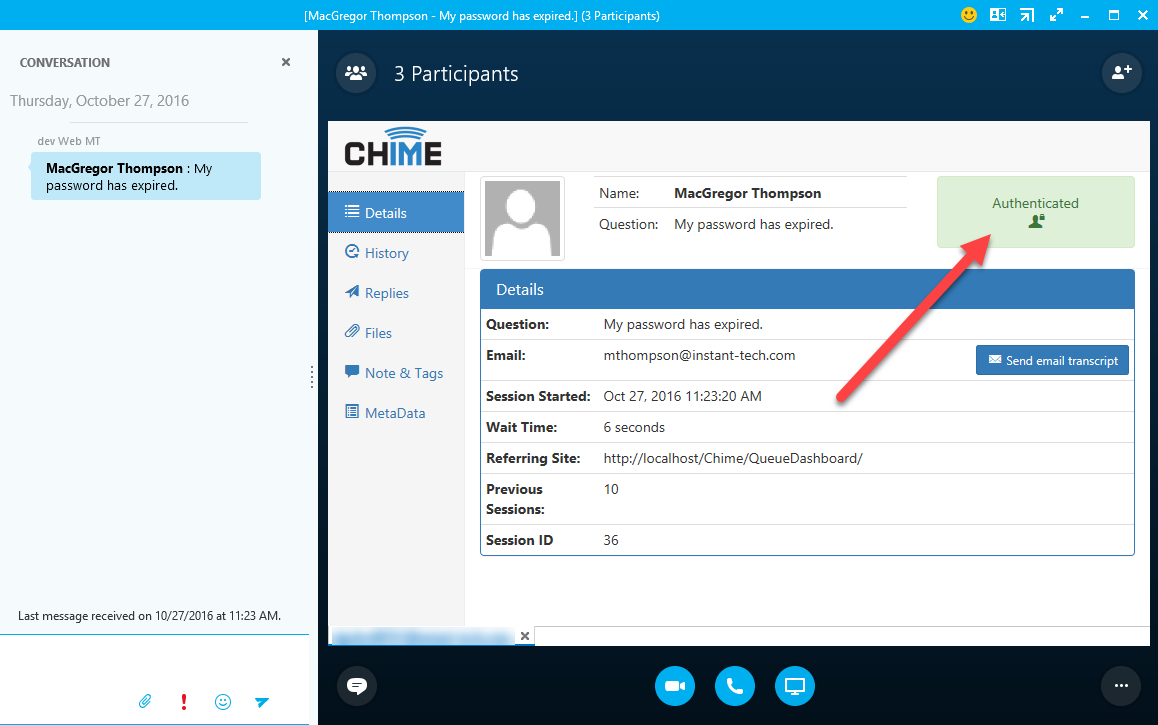 Authenticated
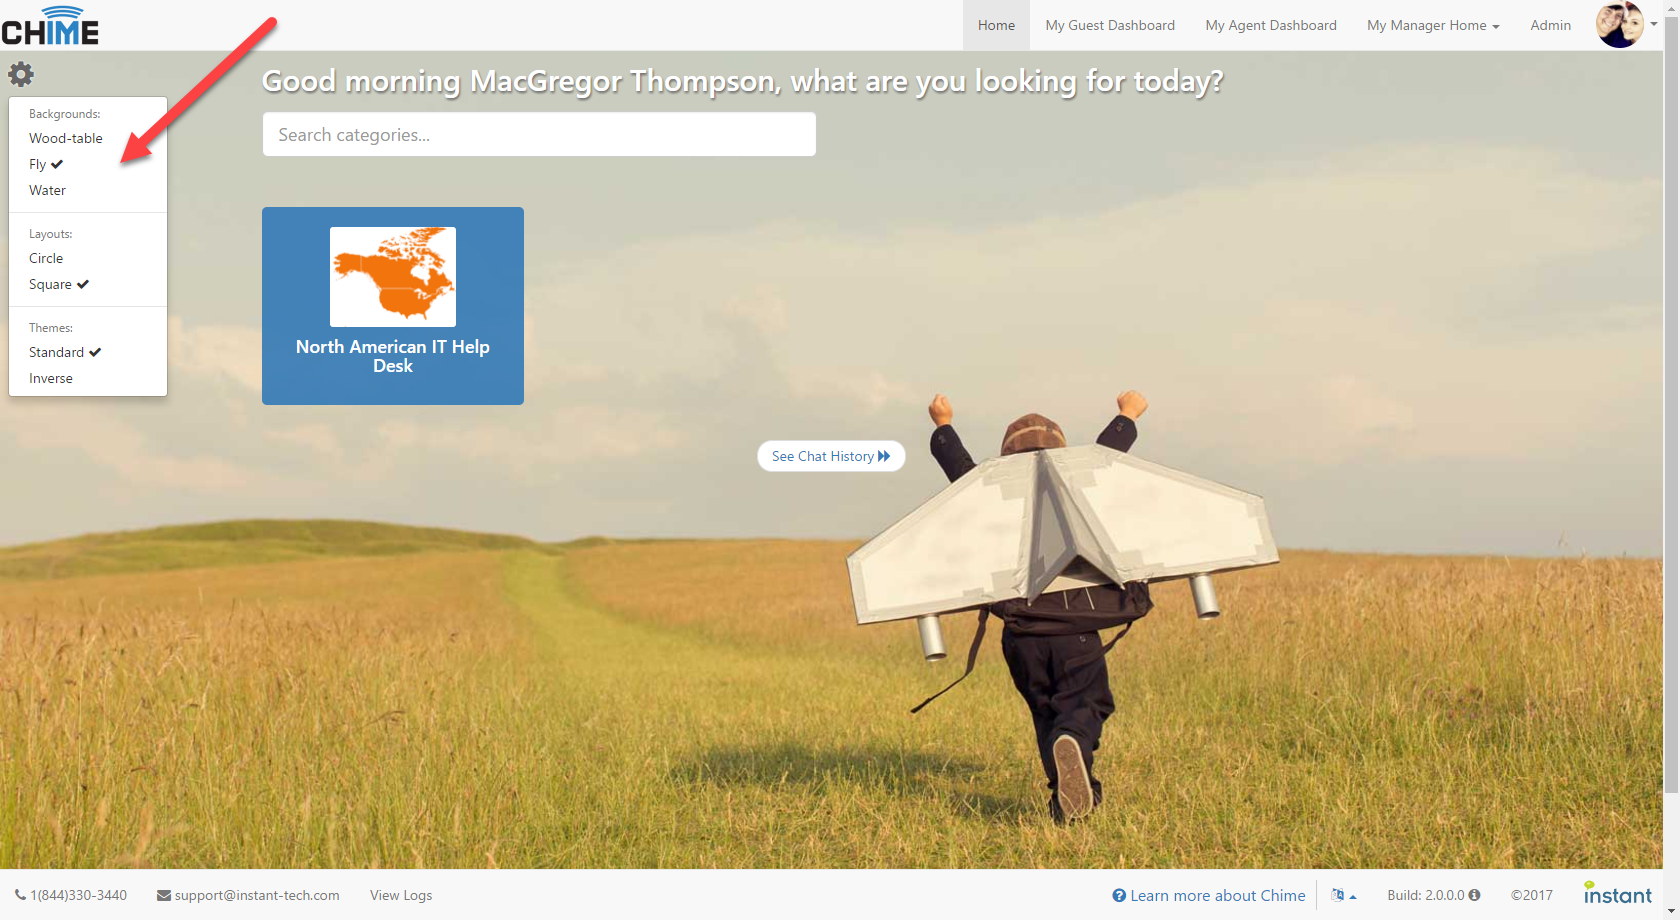
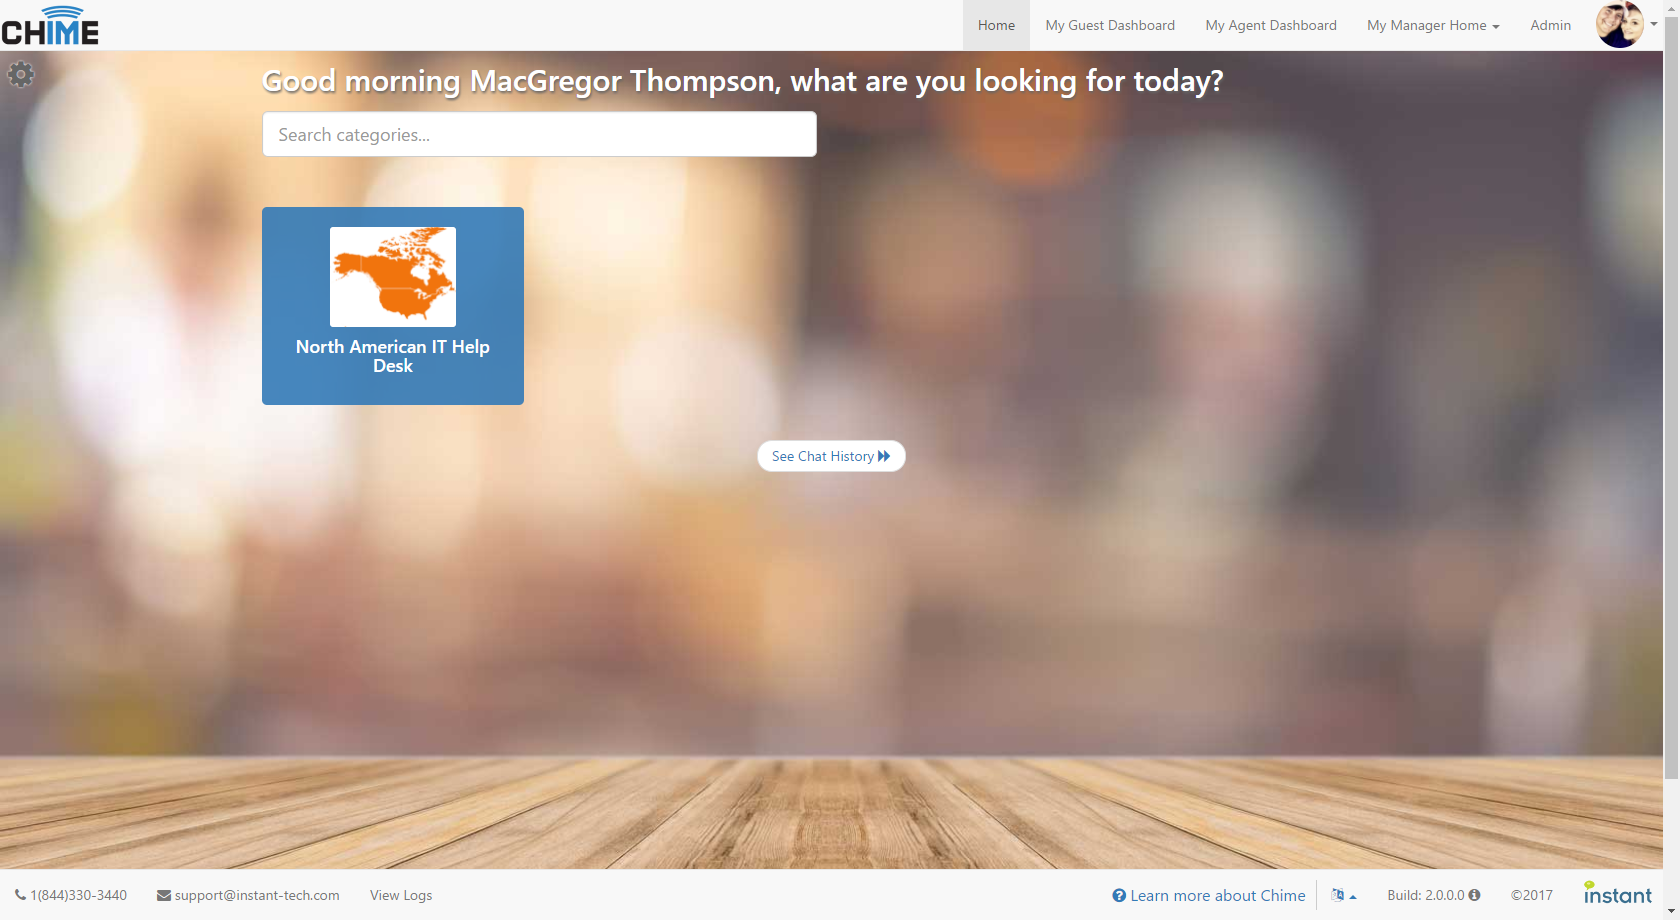
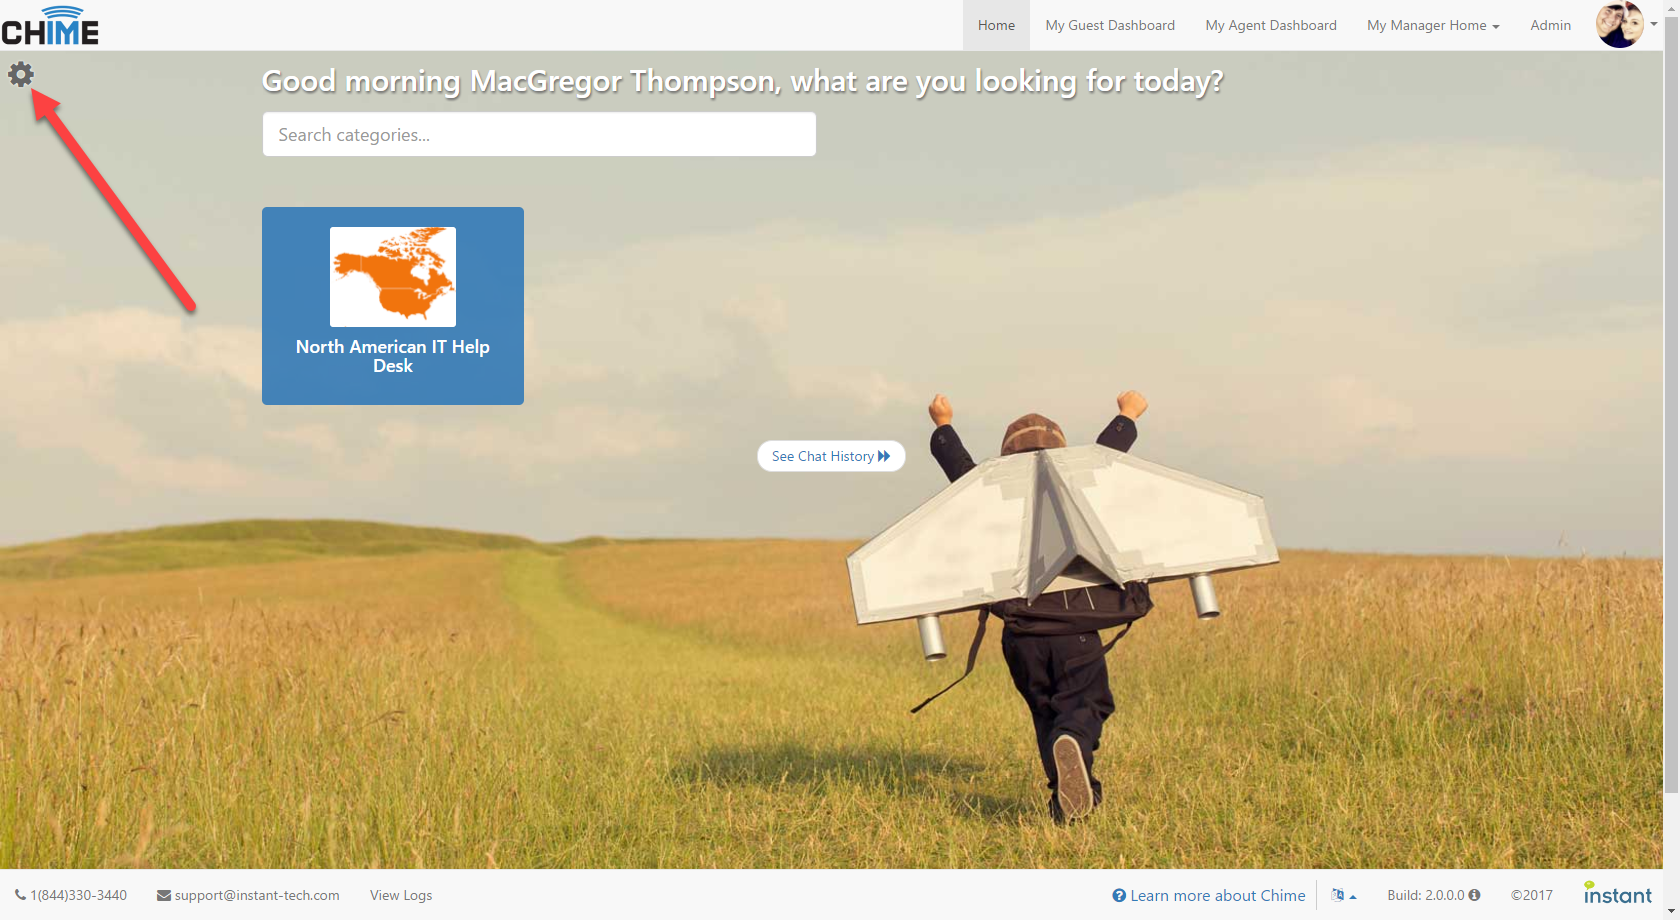 Change Backgrounds (3)
Virtual Agents FAQ
- Use SQL Server Management Studio to view the Chime database
- Open Tables and right-click dbo.VirtualAgents > edit top 200 rows
- For the Virtual Agent you would like to increase the timeout value for change the Timeout value from 3000 to 5000 (3 to 5 seconds). This is the next recommended timeout value and works for all Virtual Agent SDK samples.
- These changes will take into effect immediately within the Chime system. You won’t need to restart.