Chat with us if you have any questions!

Chime for Teams Bot Integration

Resources to integrate Bot Framework with your Chime service desk.

Microsoft Bot Framework Integration in Chime For Teams

With Instant Chime for Teams®, you can integrate your external Microsoft Bot Framework bots to help deflect incoming chats by using your existing knowledge base.

We view integration in two ways. First is having your bot beside chime and integrated via queue settings. Second is having your bot in front of chime and proxying conversations over DirectLine to help desk queues. For some examples of creating a bot, please check the Instant-Tech Public Repository:
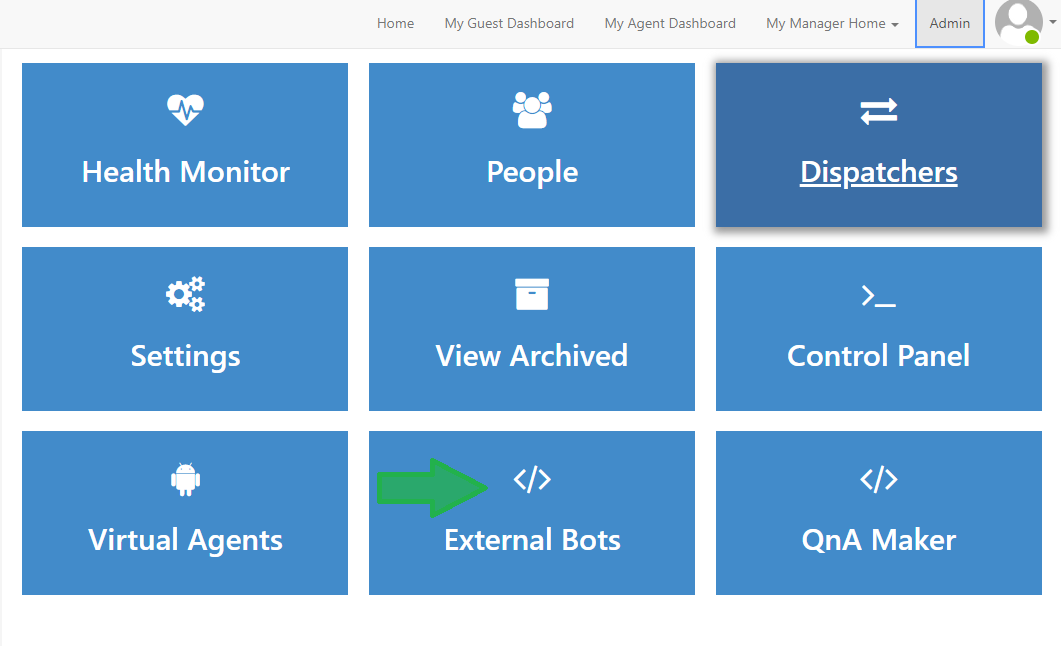
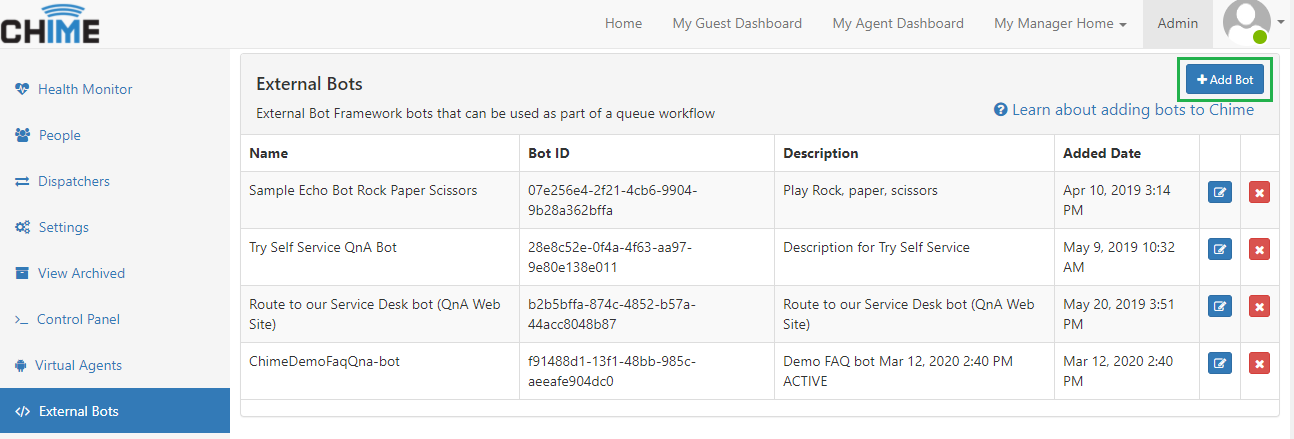
Instant-Tech Bot Code Samples »

Please note, we now support all Adaptive Card schema 1.3


Register your Bot Framework Bot in Chime

Gather Bot Information

Integrating your chat bot is easy. Once you have your Azure bot created and hosted in Azure follow the steps below to integrate your bot alongside a chime queue.

  • Navigate to https://portal.azure.com/ and log in to the subscription that your chat bot is hosted
  • Find and write down the information for the Bot Framework Direct Line Secret, Bot Display name, and the Microsoft App Id

Register the Chat Bot in Chime

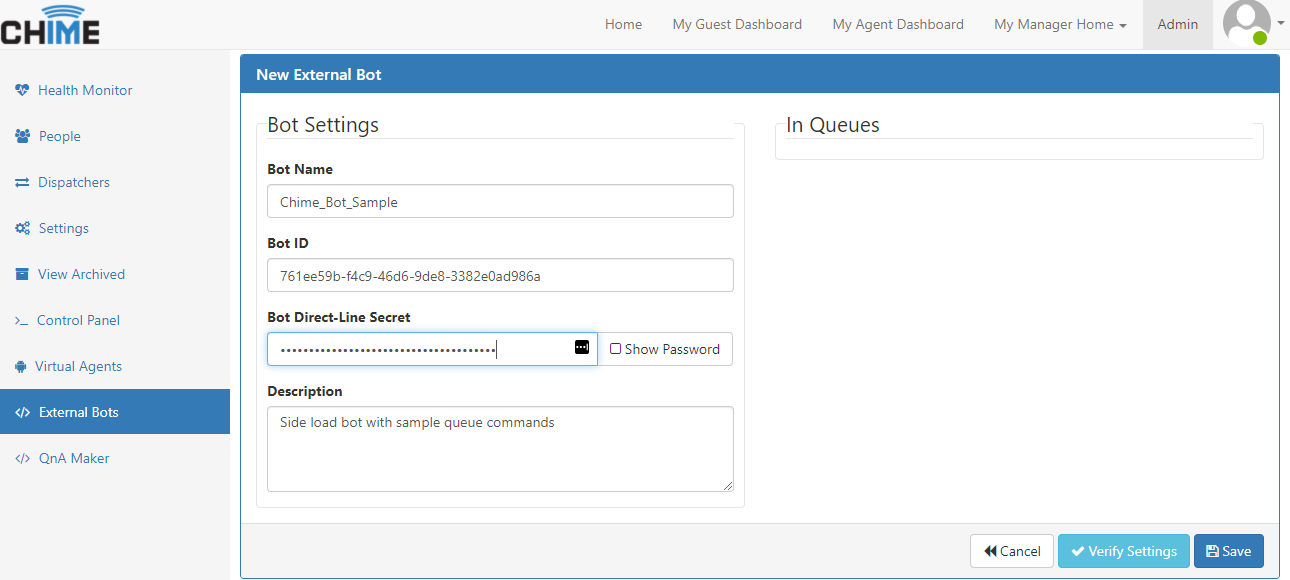
Once you have the three required pieces of information (direct line secret, display name, Microsoft app Id) you are ready to integrate the bot within chime.

  • Navigate to the Chime Admin dashboard
  • Click the External Bots tab on the center panel
  • Select Add Bot in the top right corner of the window
  • Enter the Bot Name, Bot Id, and Directline Secret
  • Click Verify Settings to verify connection to the bot
  • Once the bot has verified click the Save button on the bottom right of the window

Call Bot from Queue

Call your chat bot before routing to an Agent

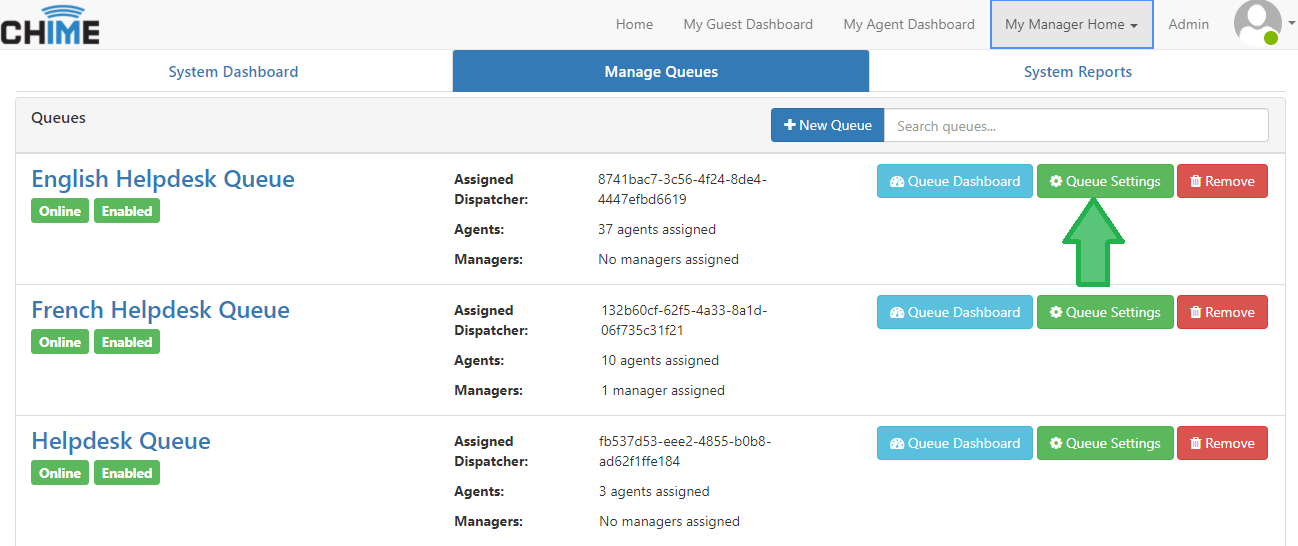
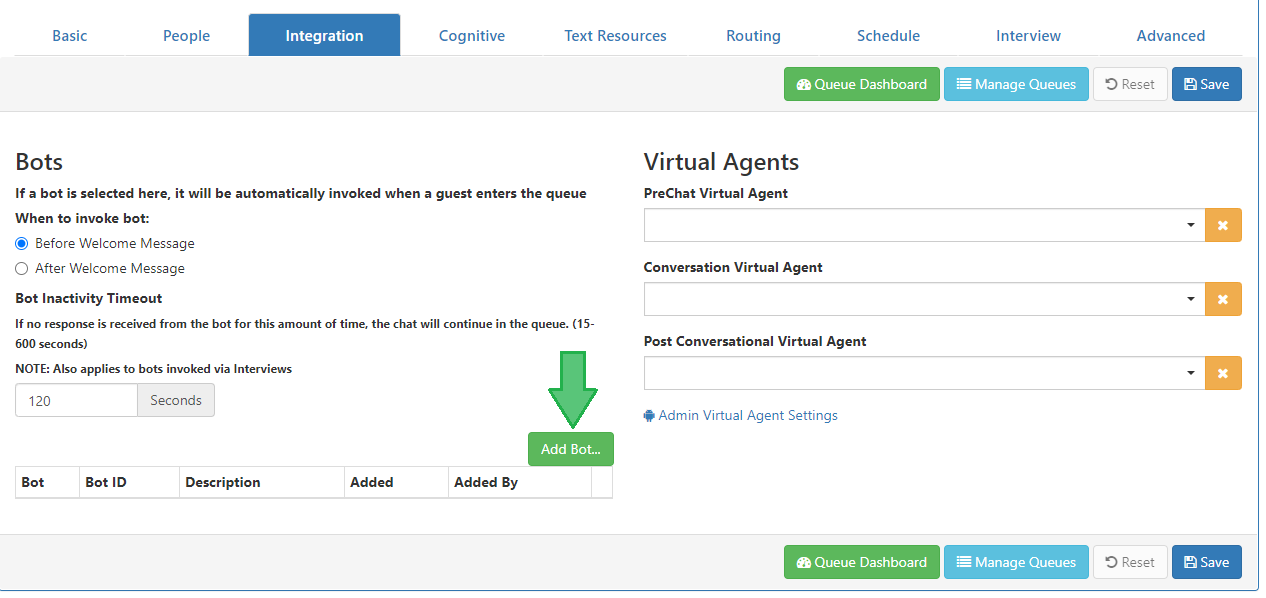
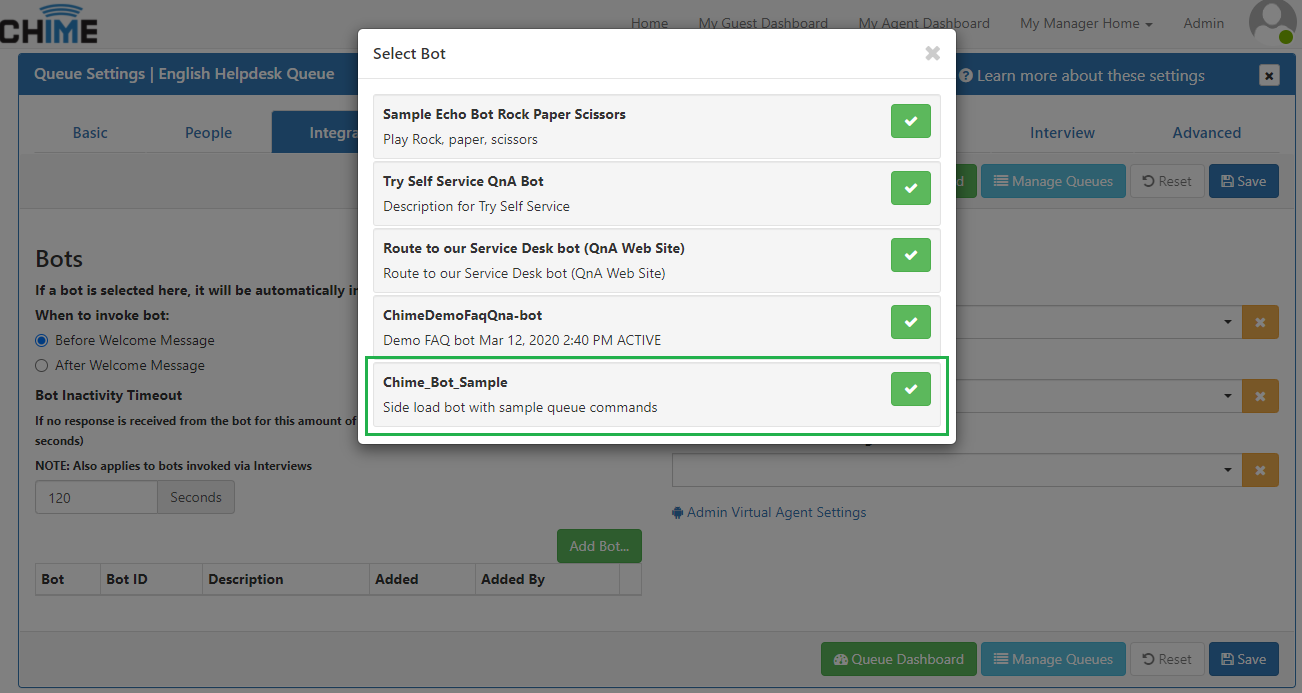
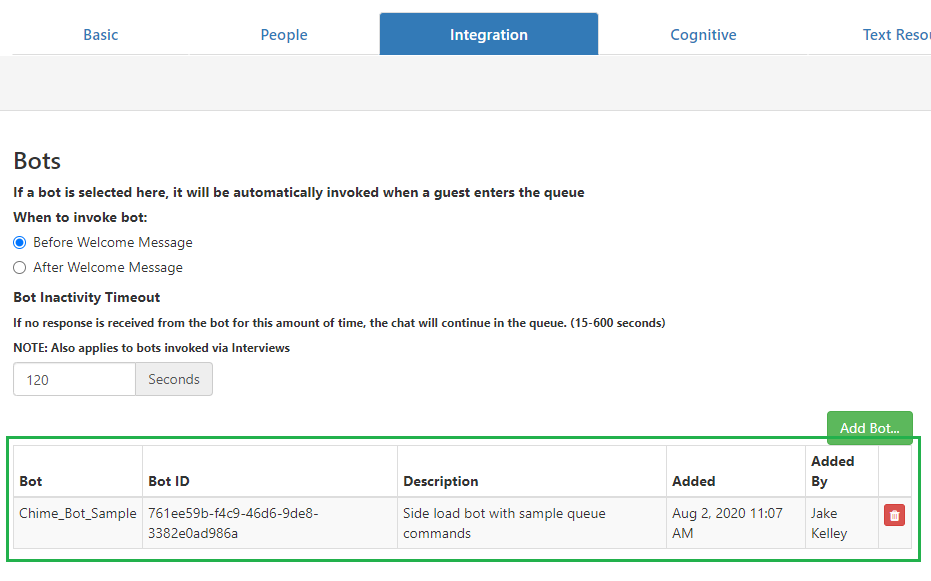
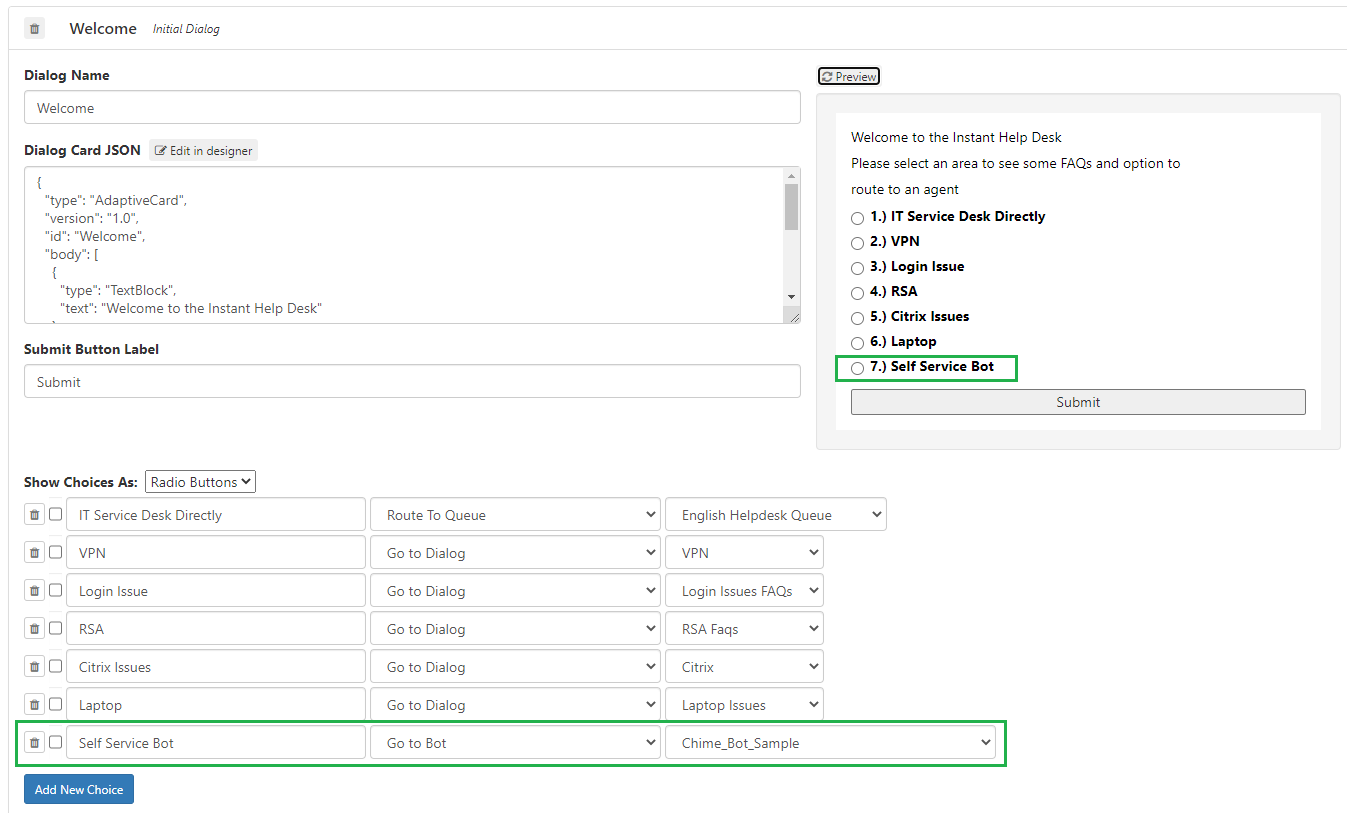
Now that your bot is integrated into the Chime Admin settings it's time to navigate to the “Queue Settings” page to integrate your bot within each queue.

  • Select My Manager Home then Manage Queues from the dropdown menu
  • Click Queue Settings on the queue where you would like to add the bot
  • Select the Integration tab, then Add Bot
  • Select the bot you would like to add via the popup menu
  • The Bot will now be in the queue

Call ChatBot from Interview

Give users the option for self service before routing

Queue interviews are now able to integrate with bots! follow these steps to have an interview pass a chat over to a bot

  • Navigate to the Interview tab in the Queue Settings
  • Click the Add New Choice button
  • Name the choice in the first option
  • Select Go to Bot in the second column
  • Choose the bot to route to in the third column

Chime Bot Text Resources

Design how bot messages will look to Guests

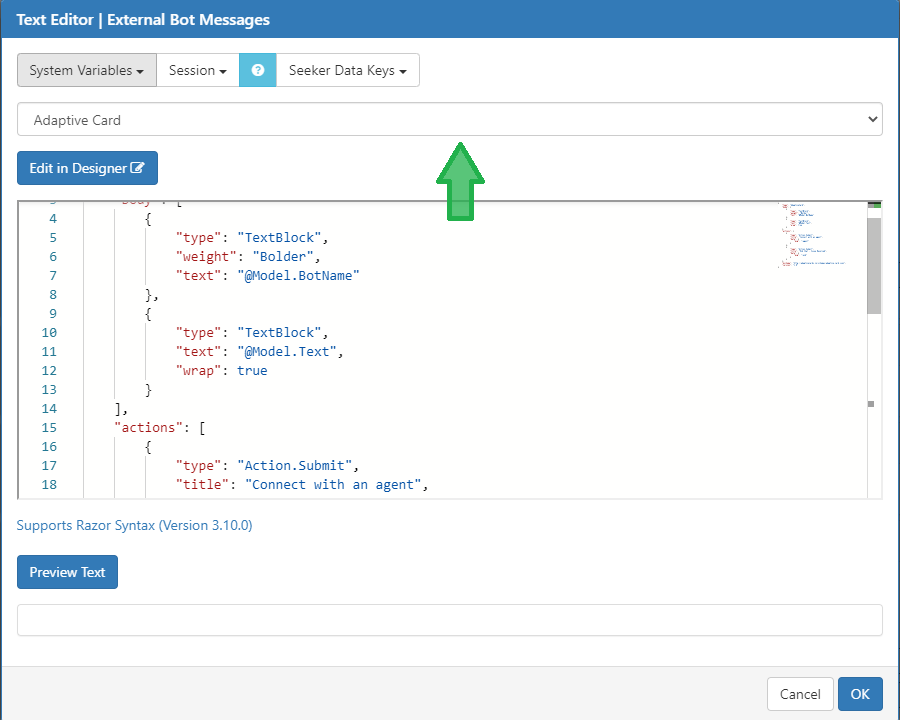
This section will cover how to customize the Text Resources that the Guest will see when they interact with a bot

  • Navigate to the Text Resources tab in the Queue Settings
  • Scroll down to the External Bot Messages Text resource
  • Click the edit button on the right side
  • In the designer you can choose to either display the message as an adaptive card or as plain text
  • If you want more editing tools for the adaptive card, click the Edit in Designer button to use the Adaptive card Editor
  • In the editor you can control where on the card elements will show up and if you want to add or remove any content

Slash Commands

These commands are used to tell the Chime queue to perform certain actions. The commands can do things like end a chat or assign a skill tag to a specific chat. The table below will cover all of the commands that bots can utilize.

Name Input Description
End Chat Session /end or /exit This command will end the chat session that is taking place and can be used by Guests, Agents, or Bots. If the chat is in the a pre-routing state, this will deflect the chat
Route to live Agent /agent This command moves a Guest from any pre-chat state (interview, bot, virtual agent) into a waiting for live agent state
Route with Skill Tag /agent /{tag} Route to a live agent with a speccified skill tag e.g. /agent /password
Transfer Chat to Queue /transfer {queueId} Transfers the chat to a differernt queue based on the queueId indicated e.g. /transfer 2

Charts and Reporting

Utilize Chimes Charts to Analyze Bot Performance

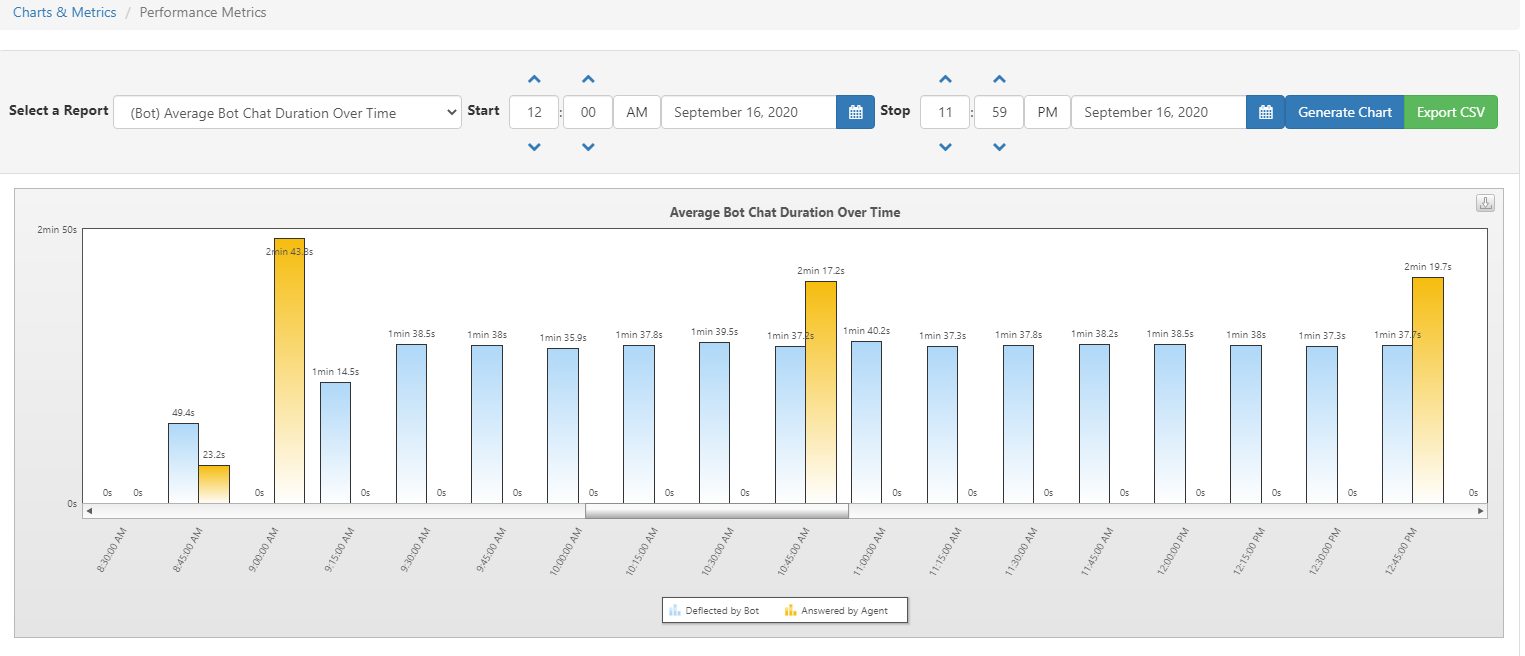
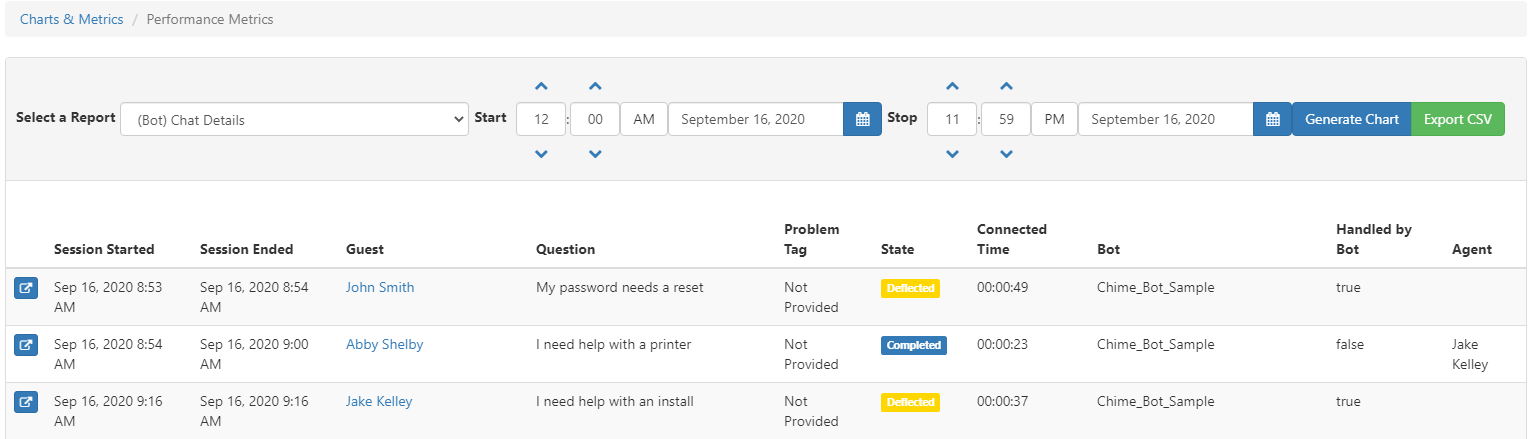
This section will cover the different charts and reports that can help track the

Average Bot Chat Duration Over Time

Answered vs Transferred vs Deflected Chats

Bot Chat Details

Deflected Chats by Bot


Integrate with Azure QnA Maker

For additional Azure QnA Maker integration content, check out our QnA Maker Wiki page

Gather QnA Knowledge Base Info

  • Before adding an Azure QnA Maker bot into Chime you will need to get the credentials for you QnA Knowledge Base
  • Go to www.qnamaker.ai/Home/MyServices and copy the Knowledge Base Name, Knowledge Base ID, Host URL, and Endpoint Key

Attach a QnA Maker Knowledge Base to Chime

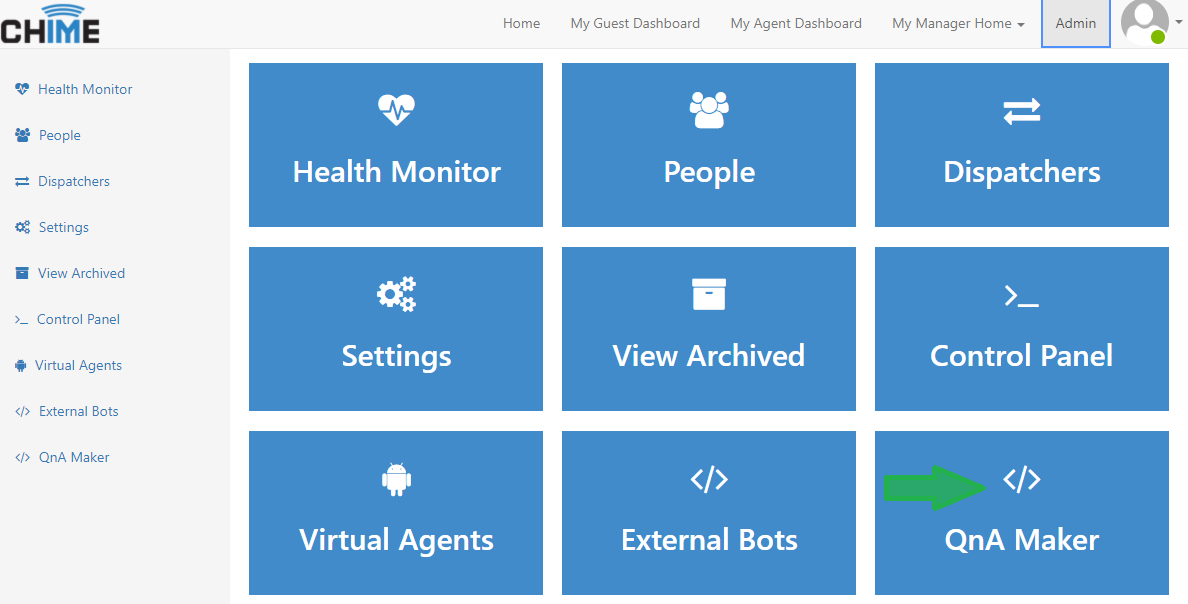
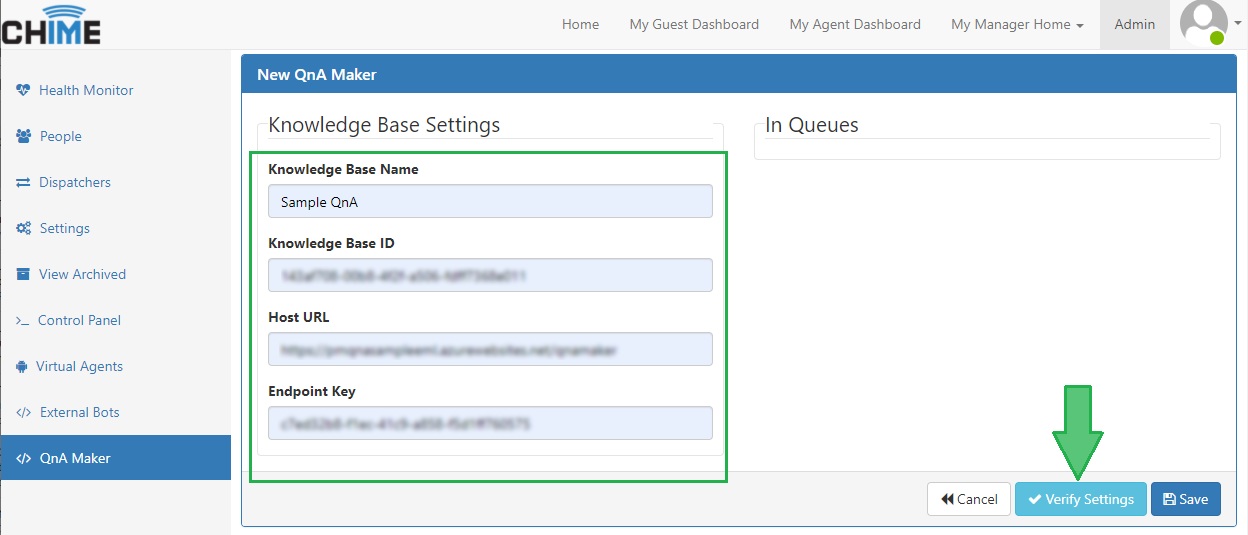
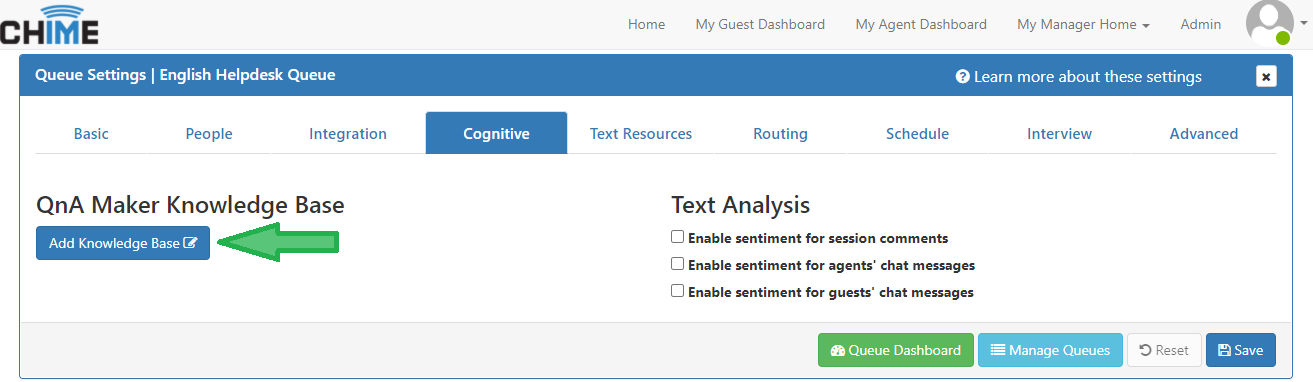
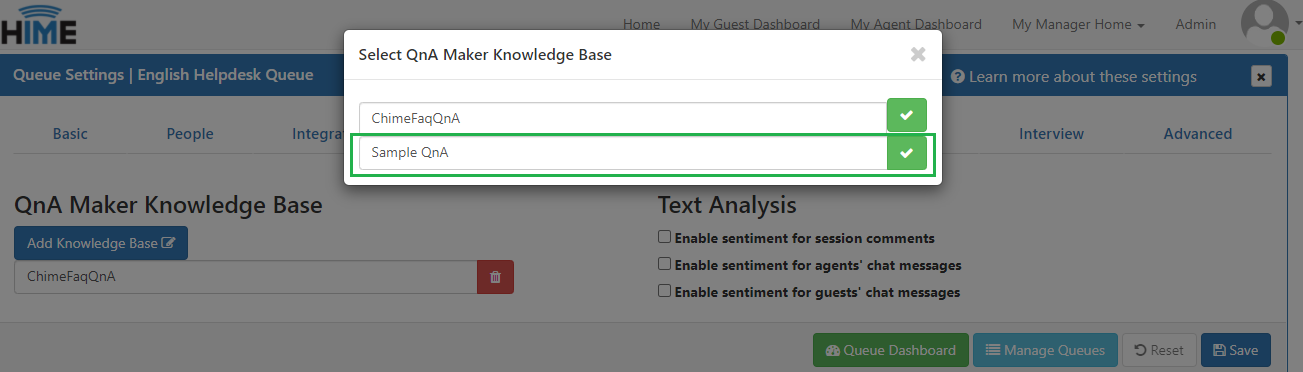
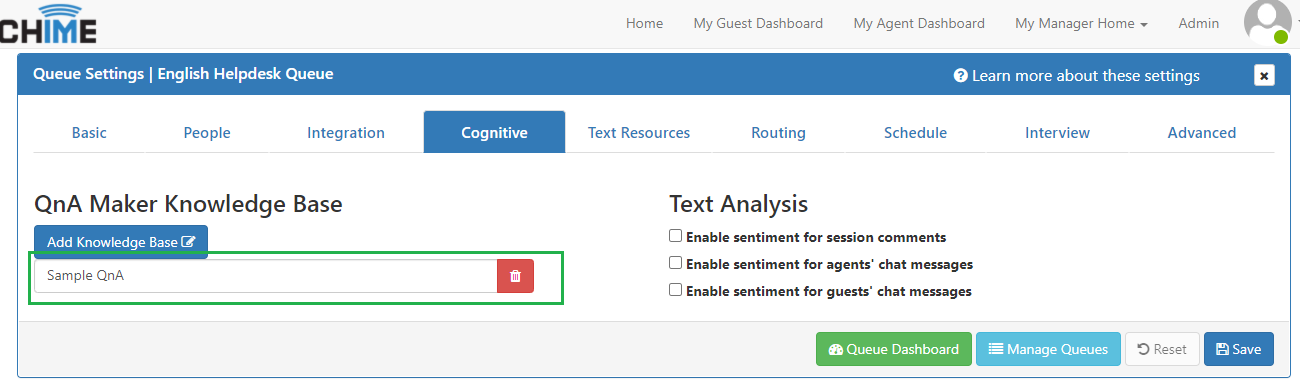
This section will cover how to add in an Azure QnA Maker knowledge base and attach it to a queue before guests route into live agents

  • In the Chime web app, navigate to the Admin section, then QnA Maker
  • Click Add Knowledge Base
  • Enter in the Knowledge Base Name, Knowledge Base ID, Host URL, and Endpoint Key
  • Click Verify Settings and then Save
  • Your Knowledge Base will be added to the list of Knowledge Bases
  • Go to Queue Settings of the Queue you want to integrate with, then selet the Cognitive tab
  • Click the Add Knowledge Base button and select the Knowledge base you want to use
  • Save the settings and your knowledge base will be assigned to the queue
  • When you start a chat session, the Knowledge Base will attempt to help the guest based on the initial question they ask

Videos

Coming Soon

More Chime Videos